
How tension rods organize small pantries and closets
Ads
Tension rods work by using an internal mechanical spring or threaded expansion barrel to exert outward pressure against two parallel, sturdy surfaces without requiring permanent screws, mounting brackets, or adhesives. They convert unused vertical and horizontal gaps into structured storage compartments, helping you store baking sheets, spice containers, accessories, and lightweight apparel in tight areas.
Ads
This hardware helps apartment renters, college students, and homeowners optimize shallow cabinets or odd alcoves without forfeiting security deposits or damaging finished wood. The primary trade-off involves load capacity, because tension rods rely purely on surface friction and will slip or collapse if loaded with heavy cookware, damp coats, or oversized pantry jars.
Ads
Mechanics of spring-loaded and twist-lock tension rods
Tension rods fall into two primary mechanical categories: spring-loaded rods and threaded twist-lock rods. Spring-loaded designs contain an internal steel coil connected to two telescoping shafts. To install this style, you pull the inner rod out slightly beyond the width of your opening, compress the internal spring by pushing inward, place the rod between the two structural surfaces, and release the tension so the spring pushes firmly against the boundaries.
Threaded twist-lock mechanisms operate differently and generally provide greater lateral resistance. In a twist-lock rod, one segment contains a threaded internal core. Rotating the rod clockwise or counterclockwise expands or contracts the overall length millimeter by millimeter. Once the rubber end caps make contact with opposing cabinet walls, continuing to twist the barrel tightens the mechanical grip, creating rigid horizontal or vertical bracing that resists shifting under moderate vertical downward weight.
Primary mechanical distinctions between standard rod designs
- Spring-loaded models: Quick to install, suitable for low-weight items, and gentle on delicate cabinet veneer.
- Twist-and-lock designs: Offer higher structural stability, handle moderate weight loads, and resist gradual loosening over time.
- End cap compositions: Rubber, silicone, or plastic tips determine the friction coefficient against smooth surfaces.
- Shaft diameters: Ranging typically from half an inch to one inch, dictating total deflection resistance.
Understanding these mechanical principles is essential when choosing tension rods for small spaces. A spring rod provides enough lateral thrust to hold flat cutting boards upright, whereas a twist-lock rod is necessary if you intend to hang cleaning spray bottles or stacked closet accessories across an open void.
Vertical pantry dividers for baking sheets and flatware
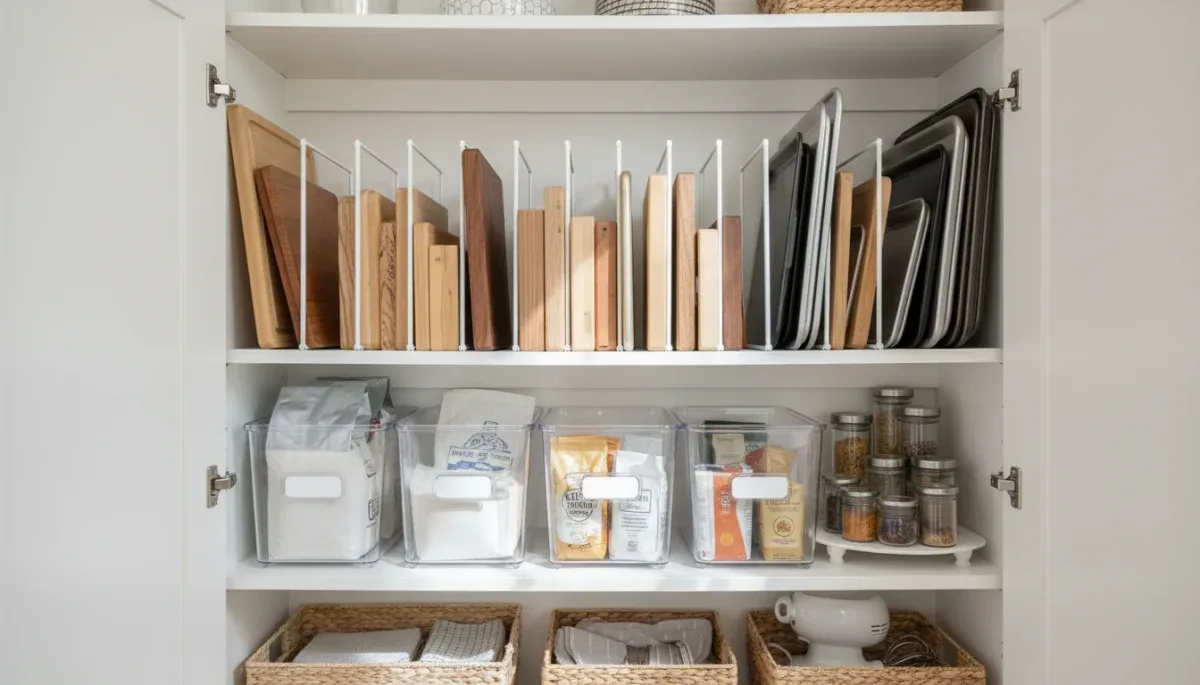
Standard pantry cabinets often present wide, tall spaces between shelves that leave several cubic feet of vertical room unoccupied. Stacking baking sheets, muffin tins, cutting boards, and serving platters flat on top of one another creates clumsy piles that are difficult to access without causing clatter and damaging nonstick coatings. Installing tension rods vertically transforms an open shelf into an organized filing system.
To create vertical slots, you position two tension rods parallel to each other from the top shelf to the bottom shelf, spaced three to five inches apart. The front rod holds the front edge of the tray upright, while the rear rod stabilizes the back corner. Because the items stand vertically, you slide individual baking sheets out smoothly without disturbing adjacent pans.
When planning vertical dividers, always position the rods slightly closer together than the widest dimension of your smallest tray. If the rods are placed too far apart, flexible plastic cutting boards can bend and wedge between the shafts. Metal cookie sheets and heavy stoneware platters place significant outward pressure on the rods if tilted sideways, so verify that the vertical tension remains secure once the shelves are fully loaded.
Horizontal hanging tiers for pantry organization and spice storage
Pantry shelves frequently suffer from dead air space between the top of canned goods and the underside of the shelf above. By mounting a horizontal tension rod two to three inches below a fixed shelf, you create an overhead hanging track for lightweight bags, packaged snacks, and hanging spice packets. Using small curtain rings equipped with spring clips allows you to clip seasoning packets, bags of nuts, and dried fruit upright, leaving the shelf space beneath completely clear for bulk containers.
Another functional pantry application involves building tiered risers for small spice jars inside shallow cupboards. Installing a tension rod horizontally an inch above the shelf surface and two inches away from the back wall creates an elevated resting ledge. When small spice jars are tilted back against this ledge, their labels face upward toward your line of sight, preventing bottles in front from completely blocking the visibility of products stored behind them.
For deep under-sink pantry cupboards where dish detergents and cleaning supplies are stored, a single horizontal rod mounted several inches below the sink basin offers an elevated hanging rail. The trigger nozzles of spray bottles rest directly over the bar, elevating the containers off the cabinet floor and opening valuable floor space for dishwashing tabs, buckets, and sponges.
Maximizing shallow bedroom closets and accessory nooks
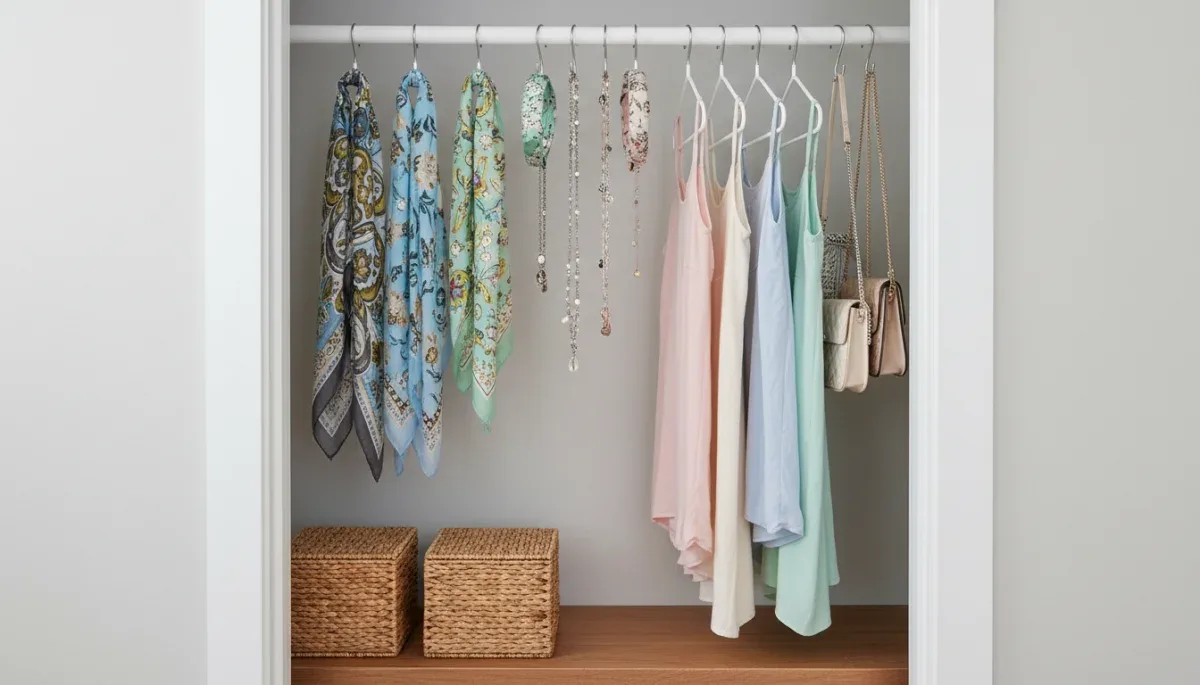
Standard bedroom closets often have narrow side gaps between the main hanging rod and the return drywall near the door frame. These side zones rarely accommodate traditional hangers because the door trim prevents standard 17-inch hangers from resting straight. A slim tension rod installed across this dead margin provides practical organization for lightweight, narrow wardrobe items.
You can run a tension rod horizontally across a 12-inch recess to hang scarves, fabric belts, fabric neckties, or jewelry displays using lightweight S-hooks. Because these accessories weigh only a few ounces each, a spring-loaded rod maintains firm contact without requiring heavy mechanical torque that could mark paint or depress drywall.
In children's closets or nursery wardrobes, tension rods can establish temporary, lowered hanging sections. Installing a secondary rod beneath adult clothing creates a child-height zone for lightweight shirts and baby garments. As the child grows, the rod can be repositioned upward or removed entirely without leaving spackle holes, wood putty residue, or peeling wall paint behind.
Weight limits and structural wall considerations
The structural limitation of any tension rod setup depends entirely on the compressive strength of the opposing walls and the coefficient of friction provided by the end caps. Most lightweight tension rods designed for utility and curtain use are rated by manufacturers for loads between 5 and 15 pounds when fully tightened across an average span.
As a tension rod is extended closer to its maximum advertised length, the internal overlap between the telescoping tubes decreases, which leads to mechanical sagging in the middle. If a rod rated for 28 to 48 inches is installed across a 46-inch span, its central load capacity is noticeably lower than if installed across a 30-inch gap. When supporting heavier kitchenware or multiple articles of clothing, selecting a rod that reaches your target width while near its minimum extension ensures maximum shaft rigidity.
Factors that influence load capacity and stability
- Overlap length: Shorter overall extension retains greater structural overlap inside the joint.
- Surface substrate: Solid wood and firm cabinetry support heavy pressure; hollow drywall may bow inward if overtightened.
- Ambient temperature: Kitchens and utility closets experience humidity fluctuations that can cause smooth laminate surfaces to slick over.
- End cap area: Broader rubber pads distribute compressive force across more surface area, reducing indentations and improving grip.
If you tighten a high-torque twist rod against thin, unbacked hollow drywall or thin veneer cabinet backing, the localized pressure can indent or puncture the surface material. Always tap the wall surface to ensure you are mounting against a solid structural frame or substantial cabinet side before applying maximum tension.
Preventing slipping on slick cabinet and drywall surfaces
A frequent problem encountered with tension rods in small spaces is gradual slippage. Over several weeks of daily vibrations, opening and closing cabinet doors, or pulling items off hanging hooks, the rubber ends can creep downward along smooth melamine, high-gloss paint, or polished wood finishes. Fortunately, you can prevent slippage without drilling permanent screw holes.
To enhance friction, clean the contact points thoroughly with isopropyl alcohol before installation to strip away cooking grease, dust films, and furniture polish. Applying small squares of clear silicone adhesive bumpers, rubber shelf liner patches, or non-permanent mounting tape directly against the cabinet wall creates a tacky, slip-resistant base for the rod caps to push against.
For situations where you need to hang slightly heavier items, you can purchase clear adhesive tension rod support cups. These small plastic discs adhere to the wall with removable, damage-free adhesive strips, providing a shallow physical lip that cradles the rod ends. This hybrid configuration combines the damage-free removal of adhesive strips with the modular adjustability of a tension rod.
At a glance
| Storage Factor | What to Know |
|---|---|
| Weight capacity | Most standard rods reliably support 5 to 15 pounds depending on total span. |
| Best pantry use | Vertical dividers for lightweight sheet pans, trays, and cutting boards. |
| Best closet use | Horizontal suspension for lightweight accessories, scarves, and jewelry. |
| Surface safety | Clean walls with alcohol and use silicone pads to prevent slipping and scuffs. |
Frequently asked questions
Can tension rods damage kitchen cabinet interiors?
Tension rods rarely cause damage if sized correctly, but overtightening a high-torque rod can crack brittle veneer or warp thin cabinet sides. To prevent indentations or finish marks, place thin silicone pads or non-slip rubber grips between the end caps and the cabinet walls.
How much weight can a standard small tension rod hold?
Most utility tension rods hold between 5 and 15 pounds when installed according to instructions. Exceeding this weight limit causes the center shaft to bow downward, pulling the rubber ends inward and causing the entire rod to slip off the wall.
Do tension rods work inside closets with textured drywall?
Tension rods can work on lightly textured drywall, but deep textures reduce the surface area contact of the rubber caps. Heavy knockdown or popcorn textures may shed debris when compressed, decreasing friction and causing the rod to slide downward under modest downward loads.
Why does my tension rod keep falling down in the pantry?
Tension rods typically fall due to insufficient tension, surface grease, or structural sagging from being overextended. Cleaning the cabinet walls with rubbing alcohol, shortening the span, or adding adhesive support cups eliminates slippage and stabilizes the installation over time.
The bottom line
Tension rods offer an affordable, drill-free way to build custom storage slots, divide cluttered bakeware, and hang clothing accessories within narrow pantries and compact closets. Success depends on respecting manufacturer load ratings, avoiding excessive tube extension, and matching the rod mechanics to the structural integrity of your cabinet walls. Before purchasing hardware, measure the exact interior width of your space and confirm that your opposing walls are rigid enough to sustain outward pressure without flexing.
Written by
Mariana Viana
Mariana Viana writes about house, electronics and clothes for onlyshein.com. Each article explains how things work, compares published details such as prices, policies and program rules, and points readers to the official source before they decide.